Your home’s irrigation system performs a valuable job each year by keeping your lawn and landscaping watered in those hot summer months. But if you want it to be ready to go when spring arrives, then you need to give it some TLC by prepping it for the winter. Just like winterizing your garage and windows protects them, winterizing your sprinkler system is key to preventing it from suffering freeze damage when the mercury drops. Here’s everything you need to know to properly winterize your sprinkler system.
Why Winterizing Your Sprinkler System Matters
Freezing temperatures damage pipes, valves, and backflow preventers
When temperatures drop below zero and water freezes, it expands. If you fail to properly winterize your sprinkler system, it can cause significant damage, according to Chris Rigby, senior contract account manager and distribution manager for Rain Bird, one of the largest manufacturers of irrigation products.
“If a “hard freeze” comes in and you have not drained the water out of these devices, you can absolutely freeze not only the plastic components but the brass or stainless steel as well, and these components are costly to repair or replace,” Rigby says.
Systems that are most at risk
While freezing poses a risk to your entire irrigation system, those parts that aren’t insulated by the ground are the most vulnerable. “The biggest threat to irrigation systems lies with the above-ground components, typically the backflow device, spigots and filters,” says Rigby. You’ll also want to pay attention to drip emitters, and pipes and fittings, as they can crack with water expansion.
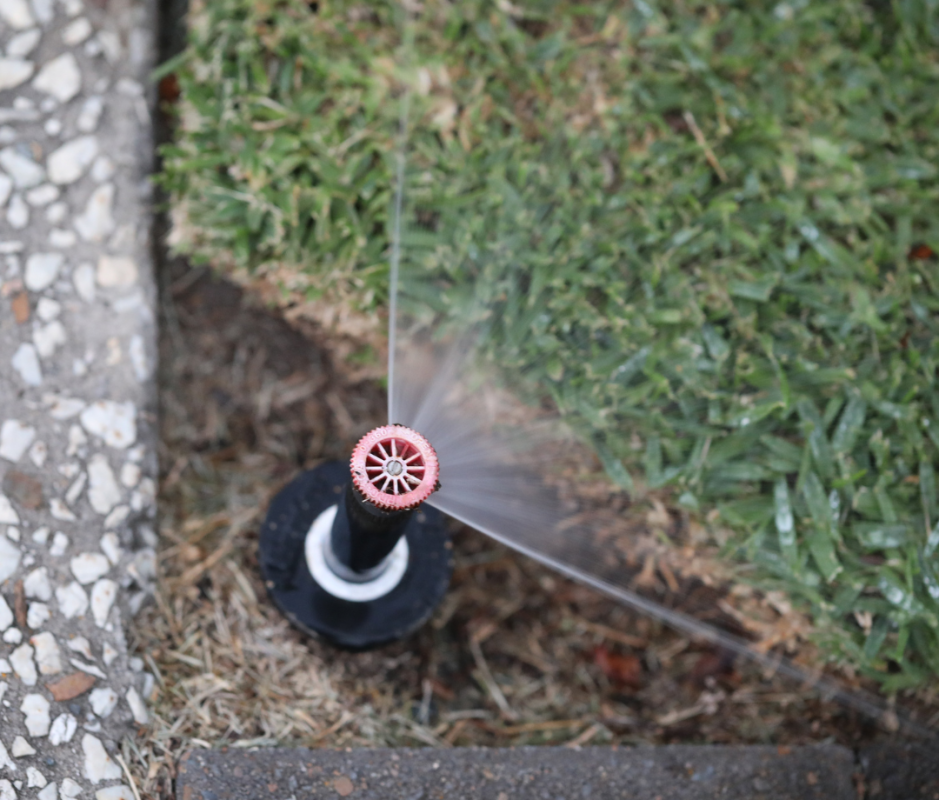
Getty Images
What You Need Before Winterizing Your Sprinkler System
Tools and equipment
Winterizing your sprinkler system requires a few hand tools, a compressor, and a special adapter that will allow you to connect your air compressor to your irrigation system. Here’s a list of what you need.
- Air compressor
- Sprinkler blowout adapter
- Set of wrenches
- Set of screwdrivers
Understanding your system type: manual drain, auto-drain, blow-out required
You can drain your system using one or a combination of the three methods below:
- Manual drain: Manually draining your irrigation system involves opening the manual drain valves on the lowest point in the system and allowing gravity to carry all of the water out. While manual draining is sufficient for warmer climates, it’s not enough to prep your irrigation system if you live in an area that experiences harsh winters.
- Automatic drain: An auto drain uses a pressure-activated valve located at the lowest point of your irrigation system to automatically empty all of the pipes when the water is shut off and pressure drops. As with manual drains, some water still may become trapped at valves or other parts of the system even after auto draining, so solely relying on an auto drain for winterizing your sprinkler system is risky.
- Blowout: This method accompanies the above winterizing methods. It involves attaching an air compressor to the irrigation system water lines using a special adapter and then blowing out any residual water left in the system, hence eliminating any chance of damage from freezing.
Safety precautions when using compressed air
While blowing out your irrigation system with an air compressor is the best way to ensure it isn’t damaged when the temperature drops below zero, doing so isn’t without risk. “When using the compressor, you want to make sure to set the pressure to 60-70 psi,” Rigby says. “If you set the pressure too high it can damage your system’s components just like high water pressure can.”
Related: When Does Grass Stop Growing?
How to Winterize a Sprinkler System
- Step 1: Shut off the irrigation water supply. Locate the shut-off valve, which is typically in a green box in your yard close to the water meter. Turn the valve so it’s perpendicular to the pipe to shut it off.
- Step 2: Relieve pressure in the system. Open the manual drain valve to relieve pressure from the system and allow the water to drain out.
- Step 3: Drain the backflow preventer and valves. Open all the manual drain valves on the system to allow water to drain out. Next, find the backflow preventer and turn the two valves connected to it to a 45 degree angle. Next use a flathead screwdriver to open the two small outlet drain valves on the backflow preventer to allow water to drain out of it.
- Step 4: Manual or auto-drain method (if applicable). If you’re using the manual method, open the valves on the lowest parts of the irrigation system to allow all of the water to drain out. If your system has an auto drain, the drain should automatically open and drain the system whenever the water pressure drops.
- Step 5: Blowout method. Connect your air compressor to one of the inlets using the blow out adapter. Turn on the air compressor to force the air out of the system, making sure to set the psi so it doesn’t exceed the limits of the system. You’ll need to clear each zone in the system individually using this method. “You will see the water misting out of the heads, and when the misting starts to slow or sputter, it’s time to move to the next station,” Rigby says.
- Step 6: Final check before the first freeze. After you finish draining or blowing out the system, leave all drain valves open and make sure you’ve drained the backflow preventer and filters. “Once the system is blown out, leave any drain valves open, and make sure the backflow, and any filters are also drained,” Rigby says. “If you do these steps, you will greatly reduce your risk of costly repairs come spring.”
Related: What Is Dormant Grass Seeding?
How to Blow Out Sprinkler Lines to Avoid Burst Pipes
Recommended psi for PVC vs polyethylene pipes
The recommended air pressure for irrigation pipes depends on which type of pipe you have. Setting your air compressor to too high a psi can damage the pipes and fittings. For systems with rigid PVC pipes, don’t use more than 70 psi. Use no higher than 50 psi for systems with flexible polyethylene pipes.
How long to run each zone
Blow out each zone for about two minutes to completely clear out the water. You’ll know it’s time to move to the next zone when water stops misting out of the sprinkler heads.
Common mistakes to avoid
There are a few pitfalls to avoid when blowing out your sprinkler system. While blowing out your system is the best way to ensure it doesn’t suffer damage from freezing, you can do more harm than good if you use too much pressure, which is why adjusting the pressure on your air compressor is crucial.
Many homeowners accidentally skip zones when winterizing their irrigation system, leaving part of the system vulnerable to freezing. Make sure to blow out each zone before calling it a day.
Related: Want to Master the Art of Landscaping? We Rated the Best Lawn and Garden Tools of 2025
Winterizing Tips for Different Climates
Mild-winter climates vs harsh-freeze regions
How thoroughly you need to drain water out of your irrigation system can vary depending on whether you experience mild or extreme winter weather. Irrigation systems in mild winter climates (zones 7 to 11) may only need manual or automatic drainage with some insulation around the main water supply valve to survive the winter unscathed. Irrigation systems in cold climates (zones 3 to 6) require the blow out method to ensure they don’t suffer damage during the winter.
FAQs About Winterizing Sprinkler Systems
Do all systems need a blowout?
No, not all systems need a blowout with air compressors. Whether or not your system needs one depends on the type of system and where you live. If you live in a harsh freeze zone (zones 3-6), where the ground freezes deep and air temperatures routinely drop below freezing for hours, you must blow out your system. You can skip the blow out method if you live in a milder climate zone (zones 7-11) and simply drain out the lines and above ground components.
Can you winterize your sprinkler system without an air compressor?
You can winterize your irrigation system without an air compressor by simply draining out the lines, valves and backflow preventer but only if you live in a mild winter climate. You’ll need to use an air compressor to blow out the lines if you live in northern regions that experience hard freezes.
Related: How to Clean Your Gutters With a Leaf Blower
How early should you winterize your sprinkler system?
You should winterize your irrigation system prior to the first hard freeze. If you live in a northern climate, plan on winterizing sometime between mid September and early November. For southern climates, you can typically wait until later November or early December to winterize.
Rigby advises paying close attention to weather forecasts when fall arrives. “The biggest mistake is assuming fall weather is steady when rapid weather shifts are common,” he says. “That is why homeowners should pay close attention to the forecast once nighttime lows approach freezing.”
When should you hire a professional?
There are a few cases when it may make sense to hire a professional to winterize your sprinkler system. If you live in a harsh-freeze region, consider hiring a professional who can execute a thorough blowout of the system, ensuring no water remains to potentially damage the system. If your sprinkler system is not designed for manual draining, you’ll need to hire a professional to winterize the system.