Shoveling is one of those home maintenance tasks, like cleaning out the gutters and prepping the garage for winter, that nobody enjoys. But it has to get done. Unfortunately, even if you do your best to get out and shovel the driveway as soon as the snow starts to fall, there will be times where you miss the easy-to-shovel window and snow accumulates on your driveway and walkways. However, if you treat the steps, walkways, driveway, and any other surfaces outdoors with a safe DIY ice melt for concrete before the snow falls, it can help to prevent ice from forming under the snow.
Additionally, if you use a homemade de-icer spray after you have shoveled the snow, it will cut through any existing ice, leaving the surface totally clear and safe for you to walk on. Preparing a solution using homemade ice melt ingredients will help you tackle ice removal on your driveways and steps this winter season, so you can keep your home ice-free. Find out how to make ice melt at home by following this DIY de-icing solution guide.
DIY Vs Commercial Ice Melt—Which Is Better?
Cost, Convenience, and Reliability
When it comes to a homemade ice melt recipe, you can expect lower upfront costs since you can use common household items, like vinegar, dish soap, and rubbing alcohol. Though, if these substances are not used correctly, they can cause damages, leading to indirect costs. Meanwhile, commercial products are generally more expensive initially, especially if you opt for a pet-safe or eco-friendly ice melt recipe.
Homemade ice melt for locks and steps, driveways, and more tends to be less convenient than using a commercial product because you need to find the ingredients, measure them out, and mix them properly. Similarly, commercial de-icers are more reliable and effective for things like car windshields. This is simply because commercial de-icers work over a wider range of temperatures and are scientifically formulated for reliable efficiency.
Related: How to Insulate Windows for Winter on a Budget
Which Ice Melt Is Safest for Pets, Plants, and Concrete Surfaces?
Safety is an important factor to consider when you are investing in commercial ice melt or when you are trying to find out what melts ice on sidewalks for DIY recipes. For instance, when comparing homemade ice melt vs rock salt, most homemade sidewalk de-icer recipes will be less damaging to concrete, asphalt, plants, and pet paws, such as beet juice ice melt spray.
However, a vinegar ice melt solution can still be harmful to concrete and metal surfaces, especially when left on them for long periods of time, so the safety of a product depends on the ingredients, how it is used, where it is used, and how frequently it is used. While most commercial products are just as likely to be harmful as DIY products, there are several commercial de-icers that are explicitly labeled as ‘pet-safe’ or ‘concrete-safe,’ so you can feel free to use them without significant risk to your pets and property.
When to Use Homemade and When to Go Commercial
Knowing when to use a homemade de-icer and when to rely on a commercial ice melt product is essential for winter safety. Skye Durrant, co-founder at LawnGuru, says that “DIY ice melt can work when you’re in a pinch and need a quick solution for a small area like a front step or short walkway. It’s cheap, easy, and you can usually make it with things you already have at home.”
Generally, if the temperature drops below 10°F (–12°C), then it is far more effective to use a commercial de-icer that is intended for use in these colder temperatures. Similarly, if you need to clear a large area, like a multi-car driveway, or you need fast, reliable results, then a commercial ice melt is the better choice.
Related: How Often Should You Change Your HVAC Filter and Which One Is Best for Your Home?
Pros and Cons of Store-Bought Vs Homemade Ice Melt
Understanding the benefits and drawbacks of store-bought vs homemade ice melt will help you decide on the best possible option based on your current needs.
- Store-bought ice melt products can be hazardous to animals and even cause harm to humans who come into contact with it. Additionally, commercial ice melt and rock salt can be very damaging to plants, so you need to be careful with your application of these products. However, Durrant notes that “if you’re dealing with a long driveway or sidewalks, cold and snowy winters, or heavy icing, it’s worth buying a commercial product. Commercial ice melts are stronger, work at lower temperatures, and give you more consistent results, especially during big storms.”
- Homemade ice melt solutions provide a gentler option for pets or vegetation, but they are slower to work and less reliable. Also, if the temperatures drop below 10°F (–12°C), then most DIY de-icers are ineffective. For this reason, “DIY ice melt should be used when you only need to cover a small area like a short walkway, porch steps, or vehicle windshield or you need an immediate emergency solution and can’t get to a store,” explains Michael Clarke, landscape architect, horticulturalist, and founder of Yardwork.
How Ice Melt Actually Works
Freezing-Point Depression and Brine Formation
A de-icer works through a freezing-point depression, which essentially means that the de-icer causes the ice to melt by lowering the freezing point of water by introducing an ingredient with a lower freezing point, like salt. This prevents water molecules from forming a solid ice crystal lattice, and the existing ice melts as the de-icer solution dissolves into it.
“When the ice melt hits the ice, it dissolves into a brine that starts breaking the bond between the ice and the pavement. That brine creates just enough heat to loosen the ice so it can be scraped or naturally melt away. Some products work faster or at colder temps than others, but they all follow that same basic process,” explains Durrant. This brine layer can also increase the risk of slipping and sliding, so you need to be extra cautious when walking or working on these surfaces until ice is fully melted and cleared away.
Why Temperature Matters: What Works at −5 °F Vs 20 °F
The minimum temperature at which the de-icer will work depends on the specific de-icer formula. Generally, the colder it gets, the less ice a pound of de-icer can melt, requiring you to use more de-icer to melt the same amount of ice. Similarly, the chemical reaction that breaks the ice down tends to slow when temperatures fall. This is because melting requires a heat transfer from the surroundings to break the bonds in the ice, and at colder temperatures, there is less heat available.
“Common types of ice melts include rock salt (sodium chloride), which works down to -20°F (–7°C), calcium chloride, which works down to –25°F (–32°C), magnesium chloride, which works down to –13°F (–25°C), and potassium chloride, which can work when temperatures are around 20°F (–7°C),” says Clarke. Most DIY solutions are effective only in mild freezing conditions (above 10°F), though solutions using alcohol can work in much colder temperatures (around -20°F).
Related: What’s the Best EV Charger and Where Should I Install It?
Essential Ingredients for Homemade Ice Melt
Salt (Sodium Chloride or Rock Salt) and Warm Water Solution
This homemade ice melt recipe is made up of three parts water and one part salt. “You can use regular table salt or rock salt,” Durrant notes. After mixing the solution, pour it on the intended surface or put the solution into a spray bottle and spray it over the target surface for a less wasteful application method.
Rubbing (Isopropyl) Alcohol and Water Solution
Rubbing alcohol can be used to make an incredible DIY de-icer due to the low freezing point of alcohol. Clarke says to “use rubbing alcohol as an ice melt spray by mixing one part water with two parts 70-percent isopropyl alcohol. This can work down to –20°F (–29°C) and is best for windshields, small walkways, and frozen car doors.” Put the solution into a spray bottle and apply it as needed.
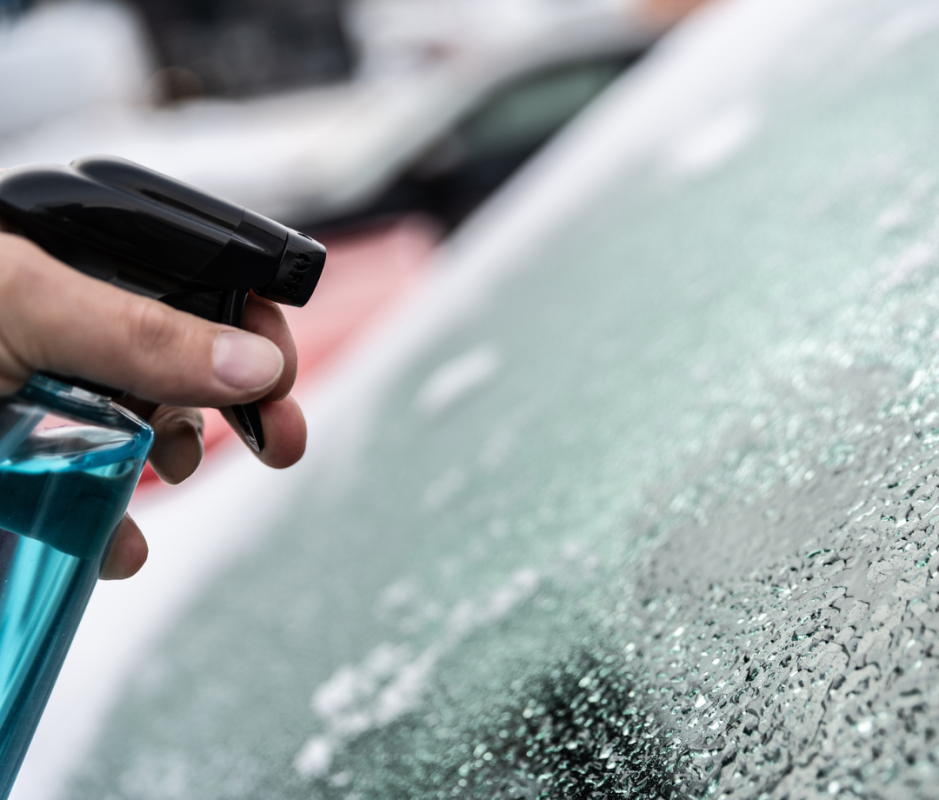
Getty Images
White Vinegar and Water Solution
While white vinegar is as effective as alcohol, it can still work in mild temperatures. “A solution of three parts white vinegar and one part water is another option that can be effective on light ice only, down to around 28°F (–2°C),” mentions Clarke. Leaving vinegar on concrete or metal surfaces, especially for an extended period of time, can damage these surfaces, so this solution should be used sparingly.
Beet Juice Dilution
If you are looking for a natural solution with minimal risks to nearby plants, then dilute beet juice with water at a 1:1 ratio and spray the solution onto icy surfaces to handle light ice at mild freezing temperatures. “Additionally, a mixture of 20 to 30 percent beet juice with rock salt brine slows freezing, reduces salt use, and sticks to surfaces better for optimal ice melt,” explains Clarke.
Vodka
Sometimes the easiest solution is something that you already have on hand with no mixing required. Since there is enough alcohol in vodka, you can actually pour vodka directly over an icy surface or put it into a spray bottle and apply it to light ice for it to act as a de-icer in below-freezing temperatures.
Related: Experts Reveal the Most Durable Garage Floor Coating You Can Buy
Pickle Brine
Similar to using vodka as a readily available de-icer, you can also use dill pickle brine to quickly and effectively handle light sheets of ice. This is because pickle brine is mostly made from vinegar and salt, making it a ready-made solution for de-icing the porch or sidewalk. Just pour it directly on or put it into a spray bottle to efficiently use over a larger surface.
Dish Soap and Alcohol Solution
A popular choice for homemade de-icer is made with dish soap, alcohol, and water. Durrant suggests that “warm water mixed with a few drops of dish soap and a good splash of rubbing alcohol can be poured over icy spots and it starts melting right away.” Specifically, you should mix two cups of isopropyl alcohol, one cup of warm water, and a few drops of dish soap in a spray bottle, then apply the mixture to icy surfaces.
Traction Materials—When Melting Isn’t Enough
While ice melt is an effective option to get rid of ice, sometimes you need a bit more help to give your car and your feet more traction. That’s when using traction materials, like sand, birdseed, dirt, or even kitty litter can come in handy. Clarke mentions that “mixing one part table salt or rock salt with three parts sand, dirt, or kitty litter will melt the ice a bit and the sand/dirt/kitty litter will provide traction. This is a great option for driveways and for traction in black ice conditions, but melting ability is limited in very cold temperatures.”
Related: This Viral Tape Hack Makes DIY Tile Walls Shockingly Easy
How to Apply DIY Ice Melt Safely and Effectively
Application Timing
Knowing when to apply the DIY de-icing solution can have a significant impact on how effective it will be. Generally, it is best to apply the ice melt before a storm, snowfall, or freezing rain when possible to help neutralize the surface adhesion and break the ice bonds before they can properly form. However, if you are spreading or spraying the ice melt during or after a freeze, then make sure to do so steadily, rather than piling it all on, so that you can give the product time to work before scraping the ice away. Clarke also notes that “before applying any type of ice melt, it’s a good idea to remove as much of the snow with a shovel to reduce how much product is needed.”
Method: Spray Vs Pour Vs Scattering
The method you use to apply the de-icer will typically depend on the type of recipe you are using. For instance, any recipe that is in a liquid form will naturally need to either be sprayed or poured, while dry granular de-icers will need to be scattered.
Spraying liquid de-icer for pre-storm use and spot de-icing is highly effective and efficient for coverage, while pouring liquid de-icer should really only be done for emergency use when there is no sprayer available because it is wasteful and less efficient than spraying. Scattering pellets or granules can help with traction and is often a good way of de-icing after a storm since it works fast on existing ice and is easier to apply than liquids.
“Focus on high traffic areas like steps, walkways, and the driveway. Always do your best to clear the area from compacted snow or thick ice first so the product can actually reach the surface. Sprinkle the ice melt evenly over the entire area. Avoid dumping piles, since piles don’t melt ice faster and they can actually end up damaging your lawn come spring,” Durrant explains.
Related: 9 Best Winter Garage Maintenance Tips for Homeowners
Precautions: Damage to Concrete, Paint, Plants, Pets and Runoff Risks
When you are handling de-icing solution, it’s recommended to wear gloves and protective eyewear to avoid skin and eye irritation. You should also only use the recommended amount, as overusing de-icer can damage vegetation, concrete, paint, and metal.
“Always apply early to prevent bonding of ice to pavement. After the ice melts, sweep up leftovers to prevent corrosion and vegetation damage and rinse surfaces, especially with concrete more than one year old to prevent damage,” says Clarke.
Avoid using salt-based de-icers near trees, shrubs and grass, and keep pets away from de-icer. If you aren’t sure you can keep your pets away from the de-icing solution, then consider using pet-safe alternatives, having them wear pet boots, or wash their paws after exposure.
When DIY Isn’t Enough—Serious Ice Conditions and Commercial De-Icers
In some cases, a DIY de-icer simply isn’t enough to get the job done, such as when you are attempting to de-ice a parking lot, a long multi-car driveway, or commercial properties. Durrant suggests opting for a commercial de-icer “when you’re working with thicker slabs of ice, or temperatures lower than the twenties since a DIY solution just doesn’t carry as well at those temperatures or over a large surface area.”
Some commercial products, especially de-icers with calcium chloride or magnesium chloride, are designed specifically for lower temperatures, while most DIY mixtures often stop working as effectively below 20°F. Similarly, if there is a major storm or the ice has built up over time while you have been away, then a commercial de-icer is far more reliable and effective for managing these serious ice conditions.
Related: How to Fix Cracks in Driveways and Steps: Concrete Patching Repair Guide
Frequently Asked Questions
Is Saltwater Solution Safe for My Driveway?
Saltwater solutions may seep into the pores of a concrete driveway, causing internal pressure that leads to cracks, pitting, and crumbling over time. This is why it is important to rinse off excess salt residue after using a saltwater solution or applying rock salt to the driveway so that you can minimize the contact time as much as possible.
Will Vinegar Damage Concrete or Metal Surfaces?
Vinegar has a high level of acidity that can cause chemical corrosion on metals, like chrome and iron, and it may slowly dissolve cement binders in concrete, causing an etching pattern. For this reason, vinegar should either not be used on these surfaces, or it should only be used sparingly and should immediately be rinsed off after use.
How Cold Can Homemade Solutions Work?
The temperature limit of a homemade de-icer depends on the ingredients used to make the de-icer. Most DIY de-icing solutions are only effective in mild freezing conditions (above 10°F), but solutions using alcohol can work in much colder temperatures (around -20°F).
Related: What Is Dormant Grass Seeding?
Can I Use These on My Car Windshield or Locks?
Not all DIY de-icers should be used on the car or windshield. For instance, while vinegar may not damage the windshield, it can potentially damage some components of your locks over time, so you should avoid using it on those. Some homemade de-icers can be used on car windshields and locks, such as recipes that have rubbing alcohol as the main ingredient.
How Often Should I Re-Apply Ice Melt?
The de-icing solution should be reapplied as needed based on weather conditions and the performance of the product. Usually, this means reapplying every two to four hours until the ice has been melted and removed, or reapplying when significant snow, freezing rain, or ice returns.
What About Eco-Friendly or Pet-Safe Options?
For a pet-safe DIY ice melt, mix dish soap, rubbing alcohol, and water, or rely on natural ice melt alternatives, such as beet juice. Additionally, you can invest in commercial products that are specifically made and labelled for environmental and pet-safe use.